Jan 28, 2014

Tuubihuivi ihan omasta hatusta *Tube scarf off the top of my head*

Lankalihotuksen myötä tuli ostettua aikalailla vahingossa teetee Taigaa. Noh, joku kiva huivihan siitä piti tehdä. Aikani Ravelryä selailtuani, tulin siihen tulokseen, ettei ainakaan ilmaisista ohjeista löytynyt ainuttakaan mieleistä. Jostain syystä mulla oli kuitenkin aika selvä visio siitä, miltä sen huivin pitäisi näyttää. Soveltamisen, modifioimisen ja hatusta vetäisemisen mestarina (ellen jopa guruna) keksin ihan oman mallin. Ja joo, ei siitä nyt ehkä tullut ihan niin yksinkertainen tehdä, kuin olin villeimmissä unissani kuvitellut. 

*When I was fattening my yarn stash I bought almost accidentally teetee Taiga yarn. Well, of course it had to be turned into scarf. After I had search through Ravelry for quite some time, I came to the conclusion there wasn't any free pattern that I liked. For some reason I had quite clear picture (in my head) how it should look. As a master (or even a guru) of application, modification and pulling off the top of my head, I created my own pattern. And yes, it didn't exactly turn out to be as simple I thought in my wildest dreams.*

Ohje/Pattern omasta päästä, selitys alla/off the top of my head, explained under 
Lanka/Yarn teetee Taiga värit/colors 3805, 5819 menekki/consumption 2*100g
Koukku/Hook 8 mm
Mitat/Measurements ympärys/diameter 76 cm, korkeus/height 30 cm

Toteutus
Mallissa on ainoastaan ketju- ja piilosilmukoita. Ja kuvahan kertoo enemmän kuin tuhat sanaa... tässä pdf tuubihuivin toteutus piirroksina.
Piirroksissa sininen ja punainen kuvaavat kahta eri lankaa, jotka voivat halutessa olla samanväriset tai eriväriset. Cyanin värinen kuvaa sitä, että sinisellä langalla tehdään piilosilmukka jo tehtyyn punaiseen lankaan. Magenta taas juuri päinvastoin eli punaisella langalla tehdään piilosilmukka sinisellä langalla tehtyyn ketjusilmukkaan. Osa piilosilmukoista on merkitty myös väkäsin, jotta piirroksista saisi edes jotain tolkkua.

Ja kyllä! Malli vaatii jonkin verran työn kääntelyä tai vaihtoehtoisesti erittäin notkeita ranteita. Tehdään kuitenkin ainoastaan oikealla puolella, jotta ketjusilmukat jäävät näkyviin. Juurikin ketjusilmukoiden ansiosta huivi on todella joustava. Kaikkia piilosilmukkakohtia en piirroksiin... noh... jaksanut laittaa, mutta näin jälkeenpäin ajateltuna eivät edes ole työn kannalta välttämättömiä ja säästää aika paljon aikaa kun ei tarvitse hyppiä kahden eri langan välillä parin silmukan välein.

*Realization
The model consist only of chain crochets and slip stitches. Picture tells more than thousand words... here's pdf, where's drawings of the tube scarf
In the drawings blue and red represent two different yarns, which can be to same colors or different colors. Cyan presents slip stitches crocheted to red chains and magenta the other way around. Some of the slip stiches are shown also with barbs, so that the drawings would be easier to read. 

And yes! The model requires whole lot of turning or else you have to have very flexible wrists. But still it is supposed to be worked only on the right side, so that the chains will appear always on the same side. Due to the chain crochets, the scarf is very stretchy. I didn't mark all the slip stitches... 'cause I was lazy. But now afterwards I have to admit that all of them aren't necessary and it saves a lot of time, when you don't have to switch between the yarns so often.*
Ja käyttötapojahan on monia... normaalisti vain kaulan ympärillä,
*And there's many ways to use the scarf... normally around your neck,*

tuplasti kaulan ympärillä, 
*twice around your neck,*

hartioiden lämmittimenä 
*as a shoulder warmer*

ja vaikkapa huppuna.
*and for instance as a hood.*
Joku supervirkkausguru voisi muuten kertoa, että onnistuisiko tämä esim. kaksipäisellä koukulla?!?

*Some supercrochetguru could tell, if this is possible to do with double ended crochet hook?!?*

Jan 23, 2014

Pitkä pitsineulebolero *Long lace knitted bolero*


Tätä boleroa olen tehnyt kuin Iisakin kirkkoa ja on muuten mun ihka ensimmäinen oikeasti isompi neuleprojekti. Marraskuussa tämä tuli aloitettua ja vihdoin sain valmiiksi. Toki tässä samalla on tullut tehtyä yhtä ja toista pienempää hommaa ja kaiken kukkuraksi lanka loppui kesken! Onneksi ei jäänyt kuin hihojen resorit, niihin nyt pystyi säveltämään vielä jotain.

*I've knitted this bolero for long and earnestly. It is also the first bigger knitting I've ever made. I started it in November and now it's finally finished. Of course I've made couple of smaller items aside and I also ran out of the yarn that I used for the bolero! Luckily I had only the cuffs left, so it was easy to figure something for them. *


Ohje/Pattern Keltainen bolero free! but only in Finnish, I'm pretty sure it has been written in English too, but can't find it!
Lanka/Yarn SandnesGarn Mandarin Classic väri/color
Puikot/Needles 6 mm

Oikein mukavahan siitä tuli. Hihoihin tosiaan vaati jonkin verran kehittelyä. Onneksi paikallisesta lankakaupasta löytyi suunnilleen samanväristä, mutta ohuempaa puuvillalankaa. Loputulemana tein hihat kahdella langalla, toinen tuo ohuempi lila ja toinen valkoista kierrätyspuuvillaa. Ratkaisu miellytti ainakin minun silmää.

*I think it turned out quite nice. The cuffs needed some creativity. Fortunately I found a cotton yarn almost the same color, but it was a lot thinner. So I knitted the cuffs with two yarns, the one that I found and white recycled cotton yarn, that I had as a leftover yarn. It looks good for me.*

Tässä vielä kuvat bolerosta kokoamisvaiheessa.
*Here's the bolero at the assembly stage.*


Valitettavasti valokuvaajan miehinen silmä ei pistänyt merkille, ettei bolero ollut ihan kunnolla päällä. Olisi myös voinut käskeä vetää vatsaa vähän sisään :D Vaikka olenhan tämän aloittamisesta laihtunut noin 6 kg, joten himppasen taisi tulla reilu kaikesta huolimatta!

*Unfortunately the manly eye of the photographer didn't see, that the bolero wasn't exactly right on me. He could have also mention to breath in and hold the breath while taking the pictures :D I have lost approximately 6 kg since I started the bolero, so it turned out almost too big.*


Jan 20, 2014

Virkattu hellehattu *Crocheted summer hat*

Eeei tuolla ulkona nyt niiiin kylmä ole, etteikö tässä voisi hellehatuistakin puhua. Onhan jossain päin maailmaa tälläkin hetkellä helle... Toki tämän samaisen lakin voi tehdä paksummasta villalangasta, jolloin lopputuloksena on jotain talvihatun tyylistä. Suomenkielisenä löytyy esimerkiksi Novitalta juuri talvikäyttöön sopiva virkattu hattu, joka on hyvin samantyylinen tämän hatun kanssa. Tämä oli nyt tosiaan se Crochet Along on Google+ -yhteisön tämän kuun arpeetti.

*Well, it's not sooo cold outside, that it's not OK to talk about summer hats. At least somewhere in the planet it's hot right now. Sure it's possible to knit this hat using thicker yarn and have a winter hat. This was the project of the month in Crochet Along on Google+ community.* 

 
Ohje/Pattern Elegant Hat free! 
Lanka/Yarn Snuggly Baby Bamboo väri/color 
Koukku/Hook  6 mm

Koska käytin huomattavasti ohuempaa lankaa, jouduin hieman tuunaamaan ohjetta, jottei hattu jää vaippaikäisen pään kokoiseksi. Ohje nyt oli muutenkin pienemmälle päälle, kun itsellä on sen 56 cm koppa. 
Eli kerros 14 tein 5 ks, 2 ks samaan silmukkaan, *9 ks, 2 ks yhteen silmukkaan* 4 ks. Lisäysten ja otsanauhan väliin tein kaikkiaan 20 kerrosta. Myös lieriin tein kaksi lisäyskerrosta enemmän. Hatusta tuli hieman reilu, mutta sehän ei haittaa. Mahtuupahan päähän, vaikka hiukset olisivat kiinni. Ja kyllä! käytin 6 mm koukkua...

*Because I used thinner yarn, I had to modify the pattern, to fit it into adult head. The pattern was also made for smaller head than my 56 cm. 
So the round 14 I made sc in next 5 sc, 2 sc in next sc, *sc in next 9 sc, 2 sc in next sc*, sc in next 4 sc. Between the increasings and the band I made total of 20 rounds. I also made two more increasing rounds to the brim. The hat turned out a bit too large, but that's fine. Now it fits even if I had my hair up. And yes! I did use 6 mm hook...*


Ohjeessahan oli myös rusetti, mutta itse en kovin ihastunut siihen, joten jätin tekemättä. Hiukkasen harkitisin kyllä kukkaa, joita olin tehnyt virkattuihin hiuspantoihin, mutta jäipä sekin tekemättä.

*In the pattern there was also a bow, but I didn't quite like it, so I left it out. I thought the flower, I made for the headbands, would fit, but didn't do that either.*

Jan 16, 2014

Katrin Lankalihotus 2014


Käsityöblogimaailmassa kiertää nyt villi Lankalaihis 2014 haaste. Koska itselleni ei ole lankoja vielä juurikaan nurkkiin kertynyt (oikeesti!), päätin ottaa tähän vuoden alkuun oman Lankalihotus 2014 operaation. Se starttasi mukavasti Kotiteollisuusliike Sukkulan loppuunmyynneistä. Yrittäjä on lopettamassa liiketoimintaansa ja lankaa lähti halvalla (kaikki -50 %) meikäläisen matkaan. Kaikkineen lankaa tarttui mukaan 1,7 kg.

Kävin jo viikonloppuna intoa tihkuen oven takana, silloin ne eivät kuitenkaan auenneet. Ovessa oli kuitenkin lappu, josta selvisi liikkeen olevan auki vielä kahtena päivänä. Pinkaisin keskiviikkona yhden aikoihin paikalle ja porukkaa oli kuin merenmutaa. Lauantaina pääsee vielä tsekkaamaan viimeiset jämät. Vähän jäi vielä himottamaan... josko sitä vielä kertaalleen piipahtaisi... Ja nythän kaikki tietysti palaa halusta tietää mitä aion näistä  tehdä?!? Vastaus: Sen näkee sitten... enkä edes yritä olla arvoituksellinen! 

*In the world of Finnish handicraft blogs, there has been a challenge (yarn weight loss), in which people commit to loose amount of yarn they think would be possible. Since I haven't been gathering that much yarn so far, I decided to start my own personal "yarn fattening". It started off nicely from closing down sale that a store called Kotiteollisuusliike Sukkula has. Overall I managed to increase my stash by 1,7 kg. 

I went to the store already last weekend, but unfortunately it was closed. There was a sign on the door though, which told the store would still be open for two days. So finally I went there yesterday afternoon and there were a lot of people. The store is open next and last time this Saturday, so it's still possible to check the sales out. Should I... well, now everyone is still asking what I'm going to make with all the yarn I already bought?!? The answer: We'll see... and I'm not even being mysterious!*

Jan 14, 2014

Helpot ja nopeat virkatut hiuspannat *Easy and fast crocheted headbands*

Jottei tämä nyt menisi täysin neulonnan puolelle, niin tähän väliin vähän virkkausta. Crochet Along on Google+ -yhteisössä oli tässä kuussa MiniCAL hiuspannat ennen varsinaista kuukauden projektia. Hiuspannoistahan mulla on jo  aikaisempaa kokemusta. Päätin kokeilla pantoja kahdesta erilaisesta langasta.

*So that this blog wouldn't end up being just about knitting, here's some crocheting. In Crochet Along on Google+ community was MiniCAL headbands before the project of this month. Since I'm already familiar with headbands, so that was good. I decided to try these with two different kinds of yarn.*

Ohje/Pattern Chunky Crochet Headband free! 
Lanka/Yarn Novita Miami väri/color 269, Novita 7 Veljestä väri/color 044
Puikot/Needles 4 mm

Tähän noin 56 cm päähäni sain mitoitettua pannan noin 70 silmukalla. Pantaahan ei suinkaan ole tarkoitus käyttää hikipanta tyylisesti, joten on aina parempi kokeilla silmukkamäärä suoraan pannan käyttäjän mukaan. Ajatukseni oli, että harmaata olisi voinut käyttää ihan talvipantana, mutta näillä pakkasilla ei ihan heti tulisi mieleen lähteä ulos pelkkä panta päässä. 

*I'm made about 70 chain crochets for my 56 cm head. Since it's not supposed to be worn like sweatband, it's good to adjust the number of crochets to its future user by trying it on. I thought the gray one would be a winter band, but now that's it's so cold in Finland (at the moment), I wouldn't even think of going out just wearing that band in my head. A real hat is definitely needed!*

Tässä vielä pannat käytössä.
*Here's the headbands in action.*


Vielä olisi tämän kuun virkkausprojekti aloittamatta. Huomenna suuntaan kyllä lankakauppaan!
*I still haven't started the crochet along of this month. Tomorrow I'm going to yarn shopping though!*

Jan 9, 2014

Virheiden korjaaminen neuleessa *Tips to fix knitting mistakes*

Kokeneille neulojille nämä jutut ovat varmasti itsestäänselvyyksiä, mutta itselleni nämä olivat oivia vinkkejä, kun tuli joskus ystäväni kanssa puheeksi virheiden korjaaminen neuleessa. Toivottavasti joku muukin saa näistä ahaa -elämyksen. Esitän tässä kaksi korjaustapaa: useamman kerroksen purku kerralla ja yksittäisten virhesilmukoiden korjaus. Kuvat avautuvat isommiksi klikkaamalla!

*For veteran knitters these tips are surely self-evidents, but for me they were great pointers, when I once talked with my friend about fixing knitting mistakes. Hope someone gets eureka moment out of this. Here I'm explaining two fixing techniques: ripping off/frogging multiple rows and fixing single stitches. To see bigger pictures, click them!* 

Useamman kerroksen purku *Ripping off/Frogging multiple rows*

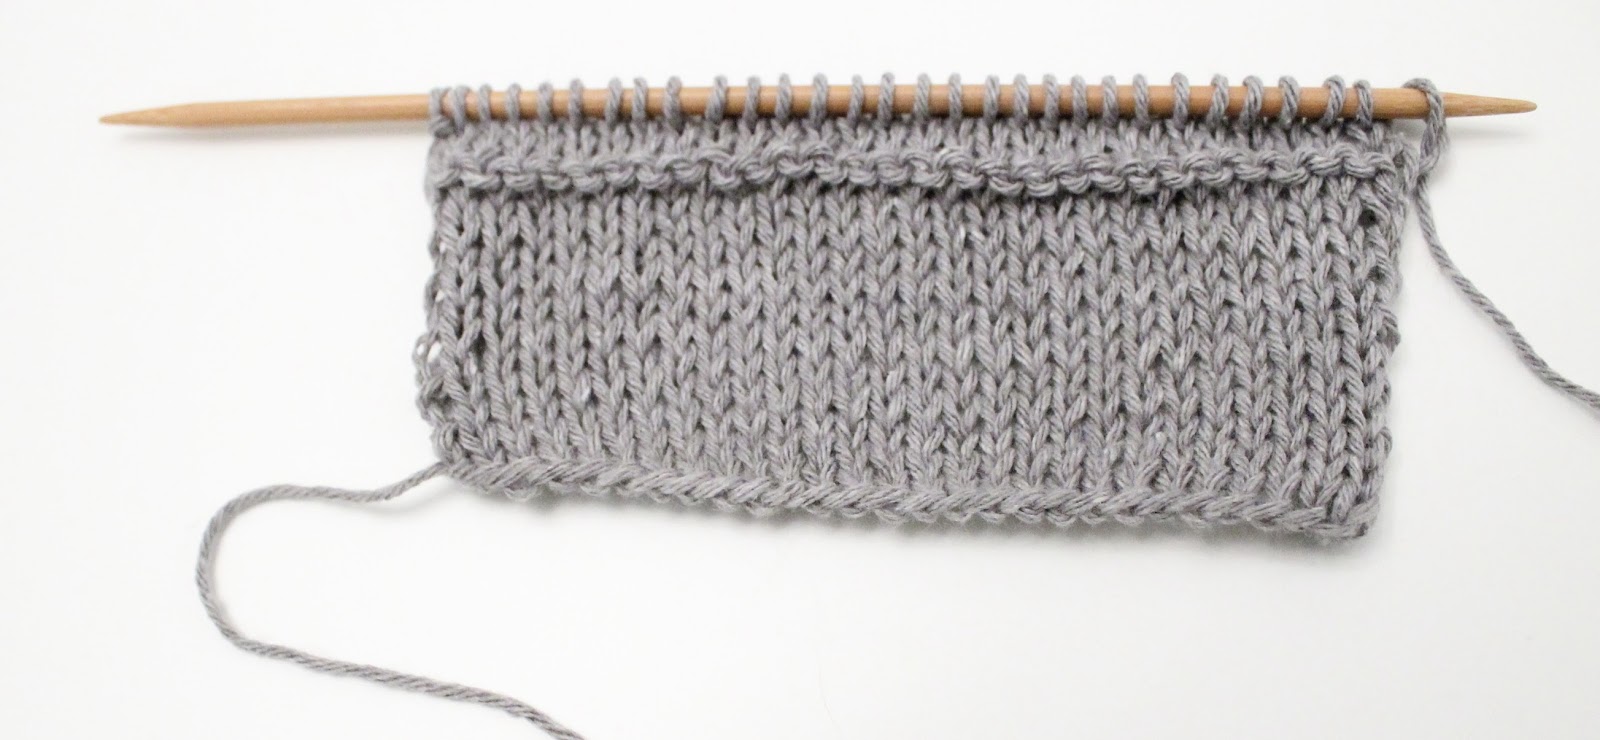
Tämä tapa toimii, kun huomaat tehneesi kerroksen väärinpäin, väärällä värillä tai virheitä on sattunut useampi moneen kerrokseen. Vaihtoehtoisestihan voi myös purkaa silmukka silmukalta tai nykäistä puikon pois, purkaa niin pitkälle kuin tarvis ja yrittää poimia silmukat kyytiin. (<-tapa jota itse käytin aluksi)

*This method works when you realize you've knitted wrong stitches, wrong color or there're many mistakes here and there. Alternatively you can do this stitch by stitch or just take off the needle, rip as much as needed and try to pick up the stitches afterwards. (<-the way I used to do)*


Ota toinen puikko ja kerää silmukat väärin menneiden silmukoiden alta. Muista poimia silmukat oikeinpäin. Esimerkkitapauksessa virhe tapahtui oikealla puolella (tämän voit laskea kerrosten määrästä). Poimin siis silmukat nurjankerroksen silmukoista ja jotta pystyn jatkamaan työtä suoraan silmukka otetaan puikolle työsuuntaan etureunasta.

*Take the other needle and pick the stitches underneath the stitches that have gone wrong. Remember to pick the stitches the right side. In this example case the mistake happened on the right side (you can count it from the amount of the rows). So I have to pick up the stitches, which I made on the wrong side, to be able to knit after ripping. This means taking the front part of the stitch on the needle.*
Tältä sen pitäisi näyttää.
*It should look like this.*

Poista ylempi puikko.
*Take off the upper needle.*

Pura.
*Rip off.*

Ja taas voit jatkaa.
*And now you're ready to continue.*


Yksittäisen silmukan korjaus *Fixing single stitch*

Tämä tapa toimii parhaiten, kun silmukoita on mennyt väärin vain muutamia. Se monta riviä virheen sattumisen jälkeen on neulonut, ei ole väliä. Tämä siis täysin sama asia kuin pudonnut silmukka!


*This method works the best, when you've knitted only few wrong stitches. It doesn't matter how many rows you've knitted after the mistake though. This is exactly the same than dropped stitch!*

Neulo sen silmukan kohtaan, jonka haluat korjata, poimi virkkuukoukulla virhettä alempi silmukka.
*Knit to the part where the mistake is, pick the stitch underneath the mistake with crochet hook.*

Pudota silmukka puikolta.
*Drop the stitch you have on the needle.*

Kerää silmukat takaisin yksi kerrallaan, vetämällä langan aina edellisen silmukan läpi.
*Pick up each row one by one, by pulling the yarn through the stitch.*

Laita korjattu silmukka takaisin puikolle.
*Put the fixed stitch back on the needle.*

Ja taas voit jatkaa.
*And now you're ready to continue.*


Jan 6, 2014

Peukalosta aloitettavat kämmekkäät sormihupuilla *Beginning with thumb mitts with finger hoods*


Nämä kämmekkäät aloitetaan neulomaan peukalosta. Ihan kiva idea, mutta tällaiselle aloittelijan tyngälle oli vähän turhan työläät. Millä ihmeellä pystyy seuraamaan telkkaria (tai edes kuuntelemaan), kun kokoajan pitää olla kartalla kerroksista ja silmukoista ja lisäyksistä ja kavennuksista. No tulipa nyt kokeiltua... Vanhalle konkarille nämä tuovat varmasti mielekkyyttä ainaisen saman mallin tikuttamiseen! Nämä olivat myös "Knit Along on Google+" -yhteisön tammikuun projekti.

*These mitts you start knitting from the thumb. Quite nice idea, but these were a bit too painful for a beginner like me. How on earth I can watch TV (or even listen), when you have to be on the ball with the amount of rows, stitches, increases and decreases. Well I made it though... For a veteran knitter, these definitely bring more sense, when you don't have to knit the same old pattern over and over again. These were also the project of the month in "Knit Along on Google+" community.* 


Ohje/Pattern Circle Mitts free! 
Lanka/Yarn Regia Garden Effects väri/color 03308
Puikot/Needles 3 mm

Kuten yleensä, piti tätäkin mallia hieman muokata. Ensinnäkin tein peukalot kokonaan ja lisäsin sormihuput. Sormihuput aloitin kärjestä Judy's Magic Cast On tekniikalla. Kämmekkääseen huppu yhdistyi näppärästi three-needle bind off menetelmällä, jota mallissa käytettiin muutoinkin. Ensin piti vain noukkia silmukat summamutikassa. 

*As always I modified the pattern a little bit. I knitted the whole thumbs and added finger hoods. The hoods I started from the top with Judy's Magic Cast On technique. To connect the hood with the mitt I used three-needle bind off method, as it was used early with the mitts. First you just had to pick up some random stitches from the mitt.*


Tässä vielä kuvia valmiista kämmekkäistä.

*Here's some photos of the mitts.*


Jan 1, 2014

Räjähtävä ötökkä -pipo *Exploding bug -hat*


En oikein välittänyt aikaisemmin tekemäni pipon mallista ja törmätessäni tähän ötökkäkuvioon Ravelry sivustolla olin myyty. Pipon malli ei niinkään ollut makuuni, mutta etenkin pieni yksityiskohta, jossa siellä täällä on räjähtäneitä ötököitä, teki vaikutuksen. Tämä sopii mielestäni sekä nuorille, että nuorekkaille!


*I didn't exactly like the model of the hat I made earlier and when I bumped into this bug pattern on Ravelry, I was sold. The exact model wasn't really my style, but especially the small details, where there're some bugs exploding, impressed me. I think this suits for youths and youthfuls.* 

Ohje/Pattern Invading Your Earspace   free! 
Lanka/Yarn Novita Wool värit/colors 099, 534
Puikot/Needles 3,5 mm
Koko/Size 56 cm pää/22" head 

Alkuun loin 135 silmukkaa, joka ei kylläkään ole parillinen luku, joten joustinneule ei mennyt tasan. Tällä silmukkamäärällä ötökkäkuvio toistuu kuitenkin mukavasti kolme kertaa. Joustinneuletta tein noin 10 kerrosta ja 5 kerrosta aina oikein. Kavennukset aloitin 6:ssa kohtaa kun työ olin noin 13 cm korkea. Ensin kavensin joka toinen kerros. Lankakerä alkoi kuitenkin näyttämään turhan pieneltä ja sovittamalla totesin, että joka kerroksella kaventamalla tulee vielä ihan sopivan kokoinen pipo, joten tihensin kavennusta loppua kohti.

*First I casted on 135 stitches, which isn't even number, so the ribbing didn't turn out even. This amount of stitches allowed the bug pattern to be repeated exactly 3 times. I knitted 10 rows of ribbing and 5 rows of garter stitches. The decreasings I started when the hat was about 13 cm and did them 6 times a row. First I decreased every second row. Later the skein started to look too small and when I tried the hat on, I was sure it would be fine if I'd decreased every row. Therefore I thickened the decreasings towards the end.*